Since the new Robinsons Orchard opened its door in Nov 2013, I had been to the place twice. The first time I was there for more that 1.5 hrs but less than 2 hrs, I incurred a parking fee of more than S$8 (can't remember the cents, I think it should be S$0.56 GST). The rates are S$2 per half hour from 8am - 11pm daily.
Today was my second visit. Though I didn't park inside the car park, I managed to find out the car park redemption policy for Robinsons. For purchases in Robinsons of S$200 (in one single receipt, no combination of receipts allowed), 1 hour free parking (a complimentary parking ticket will be issued at the cashier's to be used within the same day). 2 hours free parking for purchases of S$400 (in a single receipt) made in Robinsons.
Take note that no combination of receipts is allowed. So if you make 2 separate payments of S$200 each, you will only receive 1 hour free parking. This is what happened to a lady customer today when she made 2 separate payments in order to utilize the two S$20 Robinsons Voucher (issued for every S$200 purchase in a single receipt and can instantly offset but only one voucher against one receipt) and was surprised to learn that no combination of receipts allowed to claim the free 2 hours parking.
So, next time, better double confirm with the customer service/concierge whether can or cannot combine receipts before making payments. However, I feel that Robinsons Orchard has too much restrictions in terms of voucher usage as well as car park redemption.
Friday, December 13, 2013


Friday, March 16, 2012
Picnik to watermark photos
Today I discovered another photo editor to watermark my photos, which is much easier than photobucket. It is 'Picnik'. Too bad they will be closing on 19/4/12 and moving to Google+. In the meantime, you can enjoy their features, including Picnik Premium for free.
There's no need to download. Just go to http://www.picnik.com/ and get started.
Just upload your photo, choose the 'Text' option on the menu at the top and a box will appear on the left for you to type in the text. To type in the copyright logo ©, simply hold the 'alt option' key and 'G' (for Mac). After typing the text, hit the 'ADD' box. A text properties box will appear on the right for you to choose font colors, sizes, etc. You can move the text to your desired position on the photo. When you're all satisfied, hit the 'Save & Share' option on the menu at the top. A 'Save this photo to my computer' screen will appear. On the top menu, you can choose to save in Picasa Web Albums, Twitter, Facebook, Flickr or Photobucket. You can also email or print photo.
After selecting the platform to save your photo, give a file name and hit the 'Save Photo' box at the bottom. Depending on your options, you'll be directed to the respective platforms. If you choose to save in your computer, you will need to specify where in your computer that you would like to save the photo. For other platforms, you will be required to connect to your respective accounts with them.
There's no need to download. Just go to http://www.picnik.com/ and get started.
Just upload your photo, choose the 'Text' option on the menu at the top and a box will appear on the left for you to type in the text. To type in the copyright logo ©, simply hold the 'alt option' key and 'G' (for Mac). After typing the text, hit the 'ADD' box. A text properties box will appear on the right for you to choose font colors, sizes, etc. You can move the text to your desired position on the photo. When you're all satisfied, hit the 'Save & Share' option on the menu at the top. A 'Save this photo to my computer' screen will appear. On the top menu, you can choose to save in Picasa Web Albums, Twitter, Facebook, Flickr or Photobucket. You can also email or print photo.
After selecting the platform to save your photo, give a file name and hit the 'Save Photo' box at the bottom. Depending on your options, you'll be directed to the respective platforms. If you choose to save in your computer, you will need to specify where in your computer that you would like to save the photo. For other platforms, you will be required to connect to your respective accounts with them.
Thursday, March 15, 2012
La Mer Totally Brilliant Workshop
I attended the above-mentioned workshop on 15/3/12 from 10am-12pm at Oasia Hotel. The cost of the workshop is S$80 per person and S$120 for 2 persons. It's a 2-hour hands-on session with guidance to brilliant skin from the La Mer (pronounced as 'La Mair' by the brand & marketing manager) expert. Participants also received a welcome door gift (consists of the Eye Concentrate 3ml and the Hydrating Infusion 15ml) as well a S$80 La Mer Voucher (S$60 for each person if registered for 2 persons) which is fully redeemable for La Mer skincare. The 1st 100 UOB cardmembers who successfully registered is also pampered with a complimentary La Mer facial worth S$150.
Pictures of the door gift:-


Pictures of the Boardroom where the workshop was conducted:-


No photo taking was allowed during the workshop.
The workshop began with the brand and marketing manager introducing the history of La Mer (the famous Dr Max Huber and how he formulated Creme de la Mer, aka the Miracle Broth), followed by a short video (of course about La Mer). Then she gave a lesson on the 3 basic steps of skin care routine, ECP (Erase, Control, Protection) using the whitening collection which consists of The Cleansing Foam, The Whitening Lotion Intense, The Blanc de la Mer Infusion, The Whitening Essence Intense and Blanc de la Mer The SPF 30 UV Protecting Fluid. Erase refers to removing make-up, cleansing and exfoliating. Control refers to the moisturizing, hydrating and whitening (in USA, this is termed brightening). Protection refers to sun block to protect the skin from the sun's UV rays. As the main intention of the workshop was to introduce the whitening collection, the various products under the collection were introduced as well as their main ingredients.
Next came the hands-on segment. We were led step-by-step from removing eye make-up, mascara, face make-up to cleansing, toning, whitening, eye cream and of course, the legendary Creme de la Mer to moisturize and lastly the UV protection.
Of course, the workshop ended with participants purchasing the products. As my main intention was to try out their original formula, Creme de la Mer, I only purchased the smallest version 30ml. The cost is S$249. The 60ml is S$429 (I think, can't remember exactly).
Pictures of the Creme de la Mer 30ml:-


Pictures of the door gift:-


The Eye Concentrate 3ml

The Hydrating Infusion 15ml
Pictures of the Boardroom where the workshop was conducted:-


No photo taking was allowed during the workshop.
The workshop began with the brand and marketing manager introducing the history of La Mer (the famous Dr Max Huber and how he formulated Creme de la Mer, aka the Miracle Broth), followed by a short video (of course about La Mer). Then she gave a lesson on the 3 basic steps of skin care routine, ECP (Erase, Control, Protection) using the whitening collection which consists of The Cleansing Foam, The Whitening Lotion Intense, The Blanc de la Mer Infusion, The Whitening Essence Intense and Blanc de la Mer The SPF 30 UV Protecting Fluid. Erase refers to removing make-up, cleansing and exfoliating. Control refers to the moisturizing, hydrating and whitening (in USA, this is termed brightening). Protection refers to sun block to protect the skin from the sun's UV rays. As the main intention of the workshop was to introduce the whitening collection, the various products under the collection were introduced as well as their main ingredients.
Next came the hands-on segment. We were led step-by-step from removing eye make-up, mascara, face make-up to cleansing, toning, whitening, eye cream and of course, the legendary Creme de la Mer to moisturize and lastly the UV protection.
Of course, the workshop ended with participants purchasing the products. As my main intention was to try out their original formula, Creme de la Mer, I only purchased the smallest version 30ml. The cost is S$249. The 60ml is S$429 (I think, can't remember exactly).
Pictures of the Creme de la Mer 30ml:-


the applicator


Wednesday, March 14, 2012
How to watermark your photos in your blog?
Yesterday I suddenly have the urge to watermark my photos on my blog when I was updating it with the news of Goyard malletier coming to Singapore in the 4th quarter of 2013. After researching a bit on Google, the most commonly proposed one is the Adobe Photoshop, the other one is Picasa. Of course, there are many watermark softwares available, some are free, some you need to pay.
I accidentally found out that Photobucket also has a watermark function. As I do not wish to download any more softwares into my computer and since I already have Photobucket in my system, I decided to use it. It's pretty easy to use.
Here are the steps:-
1. Log in to Photobucket.
2. Hit the 'Upload' button (green in color) on menu bar at the top.
3. Hit 'Select photos and videos'. Choose your desired photo and upload it onto Photobucket.
4. After uploading, hit 'albums' on the menu bar at the top.
5. Click on the photo you want to watermark.
6. Place the cursor on your photo and a menu will appear on the top of the photo. Hit 'Edit'.
7. Hit 'Decorate' on the menu at the top.
8. Hit 'Text'.
9. A white box will appear on your photo. You can drag the box to the size you desire. Then you type in your text.
10. After typing in your text, you can drag the box to wherever you want it to be on your photo.
11. On the right of the photo, there's a 'Text Options' box. Highlight the 'Transparent' box. Then you can choose the font, font size or text color. When you're satisfied, hit the 'Apply' button below.
12. Remember to hit 'Save a copy' button and not 'Replace original' button if you still want to keep the original in case you want to redo your watermarking. Once watermarked, it cannot be removed. You will have to re-upload your photo if you want to redo it.
13. Go to your albums again, place the cursor on the photo you want to upload to your blog, a box will appear. Place the cursor on the direct link to copy it. Go to your blog and place the cursor on the spot where you want the photo to be and 'Ctrl V' to paste it. That's it!
16/3/12 Update:-
According to Urban 16/3/12, Goyard will be launching in Takashimaya Shopping Centre in Singapore in the 3rd quarter of 2013.
I accidentally found out that Photobucket also has a watermark function. As I do not wish to download any more softwares into my computer and since I already have Photobucket in my system, I decided to use it. It's pretty easy to use.
Here are the steps:-
1. Log in to Photobucket.
2. Hit the 'Upload' button (green in color) on menu bar at the top.
3. Hit 'Select photos and videos'. Choose your desired photo and upload it onto Photobucket.
4. After uploading, hit 'albums' on the menu bar at the top.
5. Click on the photo you want to watermark.
6. Place the cursor on your photo and a menu will appear on the top of the photo. Hit 'Edit'.
7. Hit 'Decorate' on the menu at the top.
8. Hit 'Text'.
9. A white box will appear on your photo. You can drag the box to the size you desire. Then you type in your text.
10. After typing in your text, you can drag the box to wherever you want it to be on your photo.
11. On the right of the photo, there's a 'Text Options' box. Highlight the 'Transparent' box. Then you can choose the font, font size or text color. When you're satisfied, hit the 'Apply' button below.
12. Remember to hit 'Save a copy' button and not 'Replace original' button if you still want to keep the original in case you want to redo your watermarking. Once watermarked, it cannot be removed. You will have to re-upload your photo if you want to redo it.
13. Go to your albums again, place the cursor on the photo you want to upload to your blog, a box will appear. Place the cursor on the direct link to copy it. Go to your blog and place the cursor on the spot where you want the photo to be and 'Ctrl V' to paste it. That's it!
16/3/12 Update:-
According to Urban 16/3/12, Goyard will be launching in Takashimaya Shopping Centre in Singapore in the 3rd quarter of 2013.
Tuesday, March 13, 2012
Goyard Coming to Singapore
Goyard is a French luggage manufacturer established in 1853, one year before Louis Vuitton, by Francois Goyard (1828-1890) located on the Rue Saint Honore in Paris.
Currently, Goyard has 11 stores worldwide and Singapore is not one of them. The nearest one to Singapore is in Hong Kong, The Peninsula in Tsim Sha Tsui Kowloon. Goyard lovers in Singapore have made their purchases mainly by ordering them from the Paris or London store.
According to the Monday's The Straits Times, 12/3/12, Goyard will be opening its first standalone flagship store at Takashimaya Shopping Centre in Ngee Ann City sometime around the fourth quarter of next year. Leading fashion retailer and distributor F J Benjamin will be the exclusive retailer.
Prices for the bags may start from about S$1,400, including the most talked about St Louis tote bag. Prices depend on the colors (standard/basic and special) of the bags (in the past, the St Louis bags' prices were the same for all colors. Now, the price difference between the standard/special colors applies). Standard/basic colors are black/black, black/tan and red. Special colors are green, light & dark blue, white, orange, yellow, burgundy/bordeaux. In the past, they had come out with limited edition colors like pink, gold and silver. Be expected to pay about 30% more for the special colors. They also do customization (3 stripes, 6 initials) for €EUR120 (paints) and €EUR240 (metallic paints). It takes about 6 weeks.
I myself had purchased the black/black St Louis PM tote and the Zippe GM Matignon zip around wallet, black/tan by ordering from its London store and had them shipped to Singapore.


I bought them in May 2011. I have enjoyed using them very much. Prices have since increased twice in July 2011 and February 2012 by about 20-40%.
16/3/12
Update note: According to Urban 16/3/12, Goyard will be launching in the 3rd quarter of 2013. Prices have not yet been confirmed. Based on the Hong Kong prices, they start from HK$2,300 (S$375) for the flat card case and from HK$8,700 (about S$1,420) for the classic Goyard St Louis bag.
Currently, Goyard has 11 stores worldwide and Singapore is not one of them. The nearest one to Singapore is in Hong Kong, The Peninsula in Tsim Sha Tsui Kowloon. Goyard lovers in Singapore have made their purchases mainly by ordering them from the Paris or London store.
According to the Monday's The Straits Times, 12/3/12, Goyard will be opening its first standalone flagship store at Takashimaya Shopping Centre in Ngee Ann City sometime around the fourth quarter of next year. Leading fashion retailer and distributor F J Benjamin will be the exclusive retailer.
Prices for the bags may start from about S$1,400, including the most talked about St Louis tote bag. Prices depend on the colors (standard/basic and special) of the bags (in the past, the St Louis bags' prices were the same for all colors. Now, the price difference between the standard/special colors applies). Standard/basic colors are black/black, black/tan and red. Special colors are green, light & dark blue, white, orange, yellow, burgundy/bordeaux. In the past, they had come out with limited edition colors like pink, gold and silver. Be expected to pay about 30% more for the special colors. They also do customization (3 stripes, 6 initials) for €EUR120 (paints) and €EUR240 (metallic paints). It takes about 6 weeks.
I myself had purchased the black/black St Louis PM tote and the Zippe GM Matignon zip around wallet, black/tan by ordering from its London store and had them shipped to Singapore.

Goyard St Louis PM tote black/black

Zippe GM Matignon zip around wallet black/tan
I bought them in May 2011. I have enjoyed using them very much. Prices have since increased twice in July 2011 and February 2012 by about 20-40%.
16/3/12
Update note: According to Urban 16/3/12, Goyard will be launching in the 3rd quarter of 2013. Prices have not yet been confirmed. Based on the Hong Kong prices, they start from HK$2,300 (S$375) for the flat card case and from HK$8,700 (about S$1,420) for the classic Goyard St Louis bag.
Singtel Hi-card PUK locked
If you keyed your pin wrongly for 3 consecutive times, your SIM card will be PUK locked. Simply call Singtel Hi Card hotline 1800 4822800 between 8am - 8pm. Press '0' for other enquiries, then '1' for Prepaid Mobile and then wait for an available customer care consultant. You'll be asked to verify the owner of the hi card with the name and NRIC number. You will also be asked to read out the numbers behind your SIM card to verify, so take out your SIM card before you call the hotline.
After all proper verifications, the customer care consultant will give you a 8-digit PUK code. After keying in the 8-digit code, your phone may ask you to key in a new PIN code. The Singtel customer care consultant will then ask you to switch off and on your phone again and everything will be as per normal.
Please note, after your SIM card is PUK locked, don't try to break the pin code anymore. If you key in the wrong PIN code for 10 consecutive times, your SIM card will be rendered obsolete and there's no way to revive it anymore, not even Singtel can help. You will then have to purchase a new SIM card, and that means all your data on your old SIM card will be lost and you will have to start from scratch again.
After all proper verifications, the customer care consultant will give you a 8-digit PUK code. After keying in the 8-digit code, your phone may ask you to key in a new PIN code. The Singtel customer care consultant will then ask you to switch off and on your phone again and everything will be as per normal.
Please note, after your SIM card is PUK locked, don't try to break the pin code anymore. If you key in the wrong PIN code for 10 consecutive times, your SIM card will be rendered obsolete and there's no way to revive it anymore, not even Singtel can help. You will then have to purchase a new SIM card, and that means all your data on your old SIM card will be lost and you will have to start from scratch again.
Wednesday, September 8, 2010
Long Beans with Pork (乱棍打死猪八戒)

This is a very simple and common chinese dish. I think almost every housewife knows how to cook this. I have used only 3 basic ingredients here: long beans, thin pork slices and carrot. Normally, I would add fried egg tofu, but I didn't buy it during my routine morning marketing because I thought that I still have two tubes of it in my refrigerator. Well, stock checking is also an important step in cooking. Anyway, it will not affect the taste of the dish except that my eldest son will ask why there is no fried egg tofu because it is his favourite. However, my youngest son hates it. He only likes the long beans. My second son likes the pork meat. Sometimes, instead of pork meat, I will add prawns or chicken meat (breast or fillet).
The chinese wordings in parenthesis means "A lot of wooden rods kills the Pig God". This was a nickname given to this dish, because the long beans symbolize the wooden rods and the pork meat symbolizes the Pig God {The character is from a famous masterpiece "JOURNEY TO THE WEST" which talks about a monk traveling to the west to collect the Buddha Script (唐三藏西天取经)}.
Ingredients:-
Long beans (2 packets)
Carrot, thinly sliced
Pork, thinly sliced (or prawns or chicken breast/fillet)
Egg tofu
Light soya sauce
Sesame oil
Garlic
Pepper
Cornflour
Peanut oil
Method:-
1. Wash and pluck the long beans into short strips (about 1½ inches long).
2. Cut the carrot into thin strips.
3. Marinate the pork with light soya sauce, sesame oil and pepper. Just before stir-frying, coat it with some cornflour.
4. Heat up a wok with some peanut oil.
5. Stir-fry the garlic till fragrant.
6. Add in the marinated pork and stir-fry till slightly golden brown. Dish up and set aside.
7. Heat a little peanut oil, stir-fry some garlic and carrot and then add in the long beans. Mix them well and cover with a wok cover.
8. Open the cover and stir-fry the mixture a few times until you can smell the fragrance of the long beans.
9. Lower the heat and let the long beans simmer (with the cover back on). Remember to stir-fry it every few minutes to make sure the long beans don't get burnt.
10. Use the spatula to press on the long bean to feel the degree of softness. Once it has reached your preferred softness, add in the pork, mix it well and cover it to let it simmer for a few more minutes on medium heat.
11. Then add in the fried egg tofu, mix it well, add in the light soya sauce to your taste, mix well on high heat for a few seconds, dish up and serve.
Whenever I was stir-frying the pork, the aroma will attract my second son (if he's at home) to the kitchen to find out what I was cooking. He would comment "Wah, smell so good!" I would cook this dish at least once a week. Sometimes, I would put prawns as they are said to be good for the development of the brain power. Don't know true or not, but it's definitely a good source of protein for the developing children.
Tuesday, September 7, 2010
Pan-Fried Red Garoupa with Coriander Leaves & Chili Padi
 |
| Pan-Fried Red Garoupa with Coriander Leaves & Chili Padi |
This is one of the dishes I cooked for yesterday's dinner. It's a very simple dish but it's very tasty and appetizing. I can eat a bowl of white rice drizzled with just the gravy. The tastiness comes from the Hua Diao Jiou (花雕酒), the coriander leaves and the chili padi.
I used to cook fish with dark soya sauce or black bean paste. So one day, I tried this and my family loves it.
Ingredients:-
1 piece of red garoupa (whole fish or just the tail also can)
Salt & pepper for marinating the fish
Ginger, thinly sliced
Cornflour
Coriander leaves
Chili padi (2 if you can take the spiciness, 1 if cannot)
Hua Diao Jiou (花雕酒)
Dash of Light Soya Sauce
Hot Water
Dash of Fragrant Sesame Oil
Method:-
1. Wash and scale the fish.
2. Marinate it with salt and pepper.
3. Before pan-frying, rub the fish with some cornflour.
4. Heat a little peanut oil in a wok till hot, fry some ginger till golden brown, push aside.
5. Add the fish and pan-fry both sides till slightly golden brown.
6. With the fish in the wok, splash the chinese wine in a circular movement around the side of the wok (don't pour directly into the fish). This is to evaporate the alcohol content.
7. Add a little light soya sauce and water.
8. Add in the coriander leaves, chili padi and the ginger.
9. Let it simmer, remember to turn the fish to the other side as well to let the meat absorb the gravy.
10. Splash a dash of fragrant sesame oil, mix well and off the heat.
11. Dish up and serve.
It is very appetizing with a bowl of hot, steaming white fragrant rice. You can see a lot of gravy on my dish, because my family loves to drizzle it on their hot, steaming rice. If you do not want so much gravy, you can add lesser water.
I used to cook fish with dark soya sauce or black bean paste. So one day, I tried this and my family loves it.
Ingredients:-
1 piece of red garoupa (whole fish or just the tail also can)
Salt & pepper for marinating the fish
Ginger, thinly sliced
Cornflour
Coriander leaves
Chili padi (2 if you can take the spiciness, 1 if cannot)
Hua Diao Jiou (花雕酒)
Dash of Light Soya Sauce
Hot Water
Dash of Fragrant Sesame Oil
Method:-
1. Wash and scale the fish.
2. Marinate it with salt and pepper.
3. Before pan-frying, rub the fish with some cornflour.
4. Heat a little peanut oil in a wok till hot, fry some ginger till golden brown, push aside.
5. Add the fish and pan-fry both sides till slightly golden brown.
6. With the fish in the wok, splash the chinese wine in a circular movement around the side of the wok (don't pour directly into the fish). This is to evaporate the alcohol content.
7. Add a little light soya sauce and water.
8. Add in the coriander leaves, chili padi and the ginger.
9. Let it simmer, remember to turn the fish to the other side as well to let the meat absorb the gravy.
10. Splash a dash of fragrant sesame oil, mix well and off the heat.
11. Dish up and serve.
It is very appetizing with a bowl of hot, steaming white fragrant rice. You can see a lot of gravy on my dish, because my family loves to drizzle it on their hot, steaming rice. If you do not want so much gravy, you can add lesser water.
Monday, September 6, 2010
How Do These People Survive?
Below are some funny situations I would like to share. I especially like the first two. They really made me laugh till I can't even open my eyes!
*****************************************************************
ONE
Recently, when I went to McDonald's I saw on the menu that you could have an order of 6, 9 or 12 Chicken McNuggets. I asked for a half dozen nuggets.
'We don't have half dozen nuggets,' said the teenager at the counter.
'You don't?' I replied.
'We only have six, nine, or twelve,' was the reply.
'So I can't order a half dozen nuggets, but I can order six?'
'That's right.'
So I shook my head and ordered six McNuggets
(Unbelievable but sadly true.)
TWO
I was checking out at the local Walmart with just a few items and the lady behind me put her things on the belt close to mine. I picked up one of those 'dividers' that they keep by the cash register and placed it between our things so they wouldn't get mixed.
After the girl had scanned all of my items, she picked up the 'divider', looking it all over for the bar code so she could scan it.
Not finding the bar code, she said to me, 'Do you know how much this is?'
I said to her 'I've changed my mind; I don't think I'll buy that today.'
She said 'OK,' and I paid her for the things and left.
She had no clue to what had just happened.
THREE
A woman at work was seen putting a credit card into her floppy drive and pulling it out very quickly.
When I inquired as to what she was doing, she said she was shopping on the Internet and they kept asking for a credit card number, so she was using the ATM 'thingy.'
(keep shuddering!!)
FOUR
I recently saw a distraught young lady weeping beside her car. 'Do you need some help?' I asked.
She replied, 'I knew I should have replaced the battery to this remote door unlocker. Now I can't get into my car. Do you think they (pointing to a distant convenience store) would have a battery to fit this?'
'Hmmm, I don't know. Do you have an alarm, too?' I asked.
'No, just this remote thingy,' she answered, handing it and the car keys to me. As I took the key and manually unlocked the door, I replied, 'Why don't you drive over there and check about the batteries. It's a long walk....'
PLEASE just lay down before you hurt yourself !!!
FIVE
Several years ago, we had an Intern who was none too swift. One day she was typing and turned to a secretary and said, 'I'm almost out of typing paper. What do I do?' 'Just use paper from the photocopier', the secretary told her. With that, the intern took her last remaining blank piece of paper, put it on the photocopier and proceeded to make five 'blank' copies.
SIX
A mother calls 911 very worried asking the dispatcher if she needs to take her kid to the emergency room, the kid had eaten ants. The dispatcher tells her to give the kid some Benadryl and he should be fine, the mother says, 'I just gave him some ant killer......'
Dispatcher: 'Rush him in to emergency!'
********************************************************************
I let my eldest and youngest son read this. Pertaining to Situation No. 4, I remarked to my eldest son that nowadays, the young generation relies so much on remote controls that they may not even know that there are ON/OFF switch, Volume and Channel Controls on the television. So, should the remote control malfunction, it's not the end. You can still manually control the TV.
Guess what? So, it is true. My eldest son immediately gave me a surprised look on his face. "Ah? Have meh? Where?" I brought him over to the TV and gave him a quick "tour" on where the controls are located. I'm sure his expression tells me that he is "amused" by this new discovery.
*****************************************************************
ONE
Recently, when I went to McDonald's I saw on the menu that you could have an order of 6, 9 or 12 Chicken McNuggets. I asked for a half dozen nuggets.
'We don't have half dozen nuggets,' said the teenager at the counter.
'You don't?' I replied.
'We only have six, nine, or twelve,' was the reply.
'So I can't order a half dozen nuggets, but I can order six?'
'That's right.'
So I shook my head and ordered six McNuggets
(Unbelievable but sadly true.)
TWO
I was checking out at the local Walmart with just a few items and the lady behind me put her things on the belt close to mine. I picked up one of those 'dividers' that they keep by the cash register and placed it between our things so they wouldn't get mixed.
After the girl had scanned all of my items, she picked up the 'divider', looking it all over for the bar code so she could scan it.
Not finding the bar code, she said to me, 'Do you know how much this is?'
I said to her 'I've changed my mind; I don't think I'll buy that today.'
She said 'OK,' and I paid her for the things and left.
She had no clue to what had just happened.
THREE
A woman at work was seen putting a credit card into her floppy drive and pulling it out very quickly.
When I inquired as to what she was doing, she said she was shopping on the Internet and they kept asking for a credit card number, so she was using the ATM 'thingy.'
(keep shuddering!!)
FOUR
I recently saw a distraught young lady weeping beside her car. 'Do you need some help?' I asked.
She replied, 'I knew I should have replaced the battery to this remote door unlocker. Now I can't get into my car. Do you think they (pointing to a distant convenience store) would have a battery to fit this?'
'Hmmm, I don't know. Do you have an alarm, too?' I asked.
'No, just this remote thingy,' she answered, handing it and the car keys to me. As I took the key and manually unlocked the door, I replied, 'Why don't you drive over there and check about the batteries. It's a long walk....'
PLEASE just lay down before you hurt yourself !!!
FIVE
Several years ago, we had an Intern who was none too swift. One day she was typing and turned to a secretary and said, 'I'm almost out of typing paper. What do I do?' 'Just use paper from the photocopier', the secretary told her. With that, the intern took her last remaining blank piece of paper, put it on the photocopier and proceeded to make five 'blank' copies.
SIX
A mother calls 911 very worried asking the dispatcher if she needs to take her kid to the emergency room, the kid had eaten ants. The dispatcher tells her to give the kid some Benadryl and he should be fine, the mother says, 'I just gave him some ant killer......'
Dispatcher: 'Rush him in to emergency!'
********************************************************************
I let my eldest and youngest son read this. Pertaining to Situation No. 4, I remarked to my eldest son that nowadays, the young generation relies so much on remote controls that they may not even know that there are ON/OFF switch, Volume and Channel Controls on the television. So, should the remote control malfunction, it's not the end. You can still manually control the TV.
Guess what? So, it is true. My eldest son immediately gave me a surprised look on his face. "Ah? Have meh? Where?" I brought him over to the TV and gave him a quick "tour" on where the controls are located. I'm sure his expression tells me that he is "amused" by this new discovery.
Sunday, September 5, 2010
Moleskine Folio Professional A4 Ringbinder & Organising Set
 |
| Folio A4 Ringbinder |
All Folio items still retain the classic features of Moleskine - ivory color pages, smooth black cover, thick paper, rounded corners, elastic band closure (where applicable), inner expandable pocket and the little booklet with the history of Moleskine's legendary notebooks.
All paper used in the Folio collection (with the exception of the Folio Index) is certified by the Forest Stewardship Council (FSC), an international non-profit organization established in 1993 to promote socially and environmentally responsible management of the world's forests.
Below are the detailed photos of this item:-
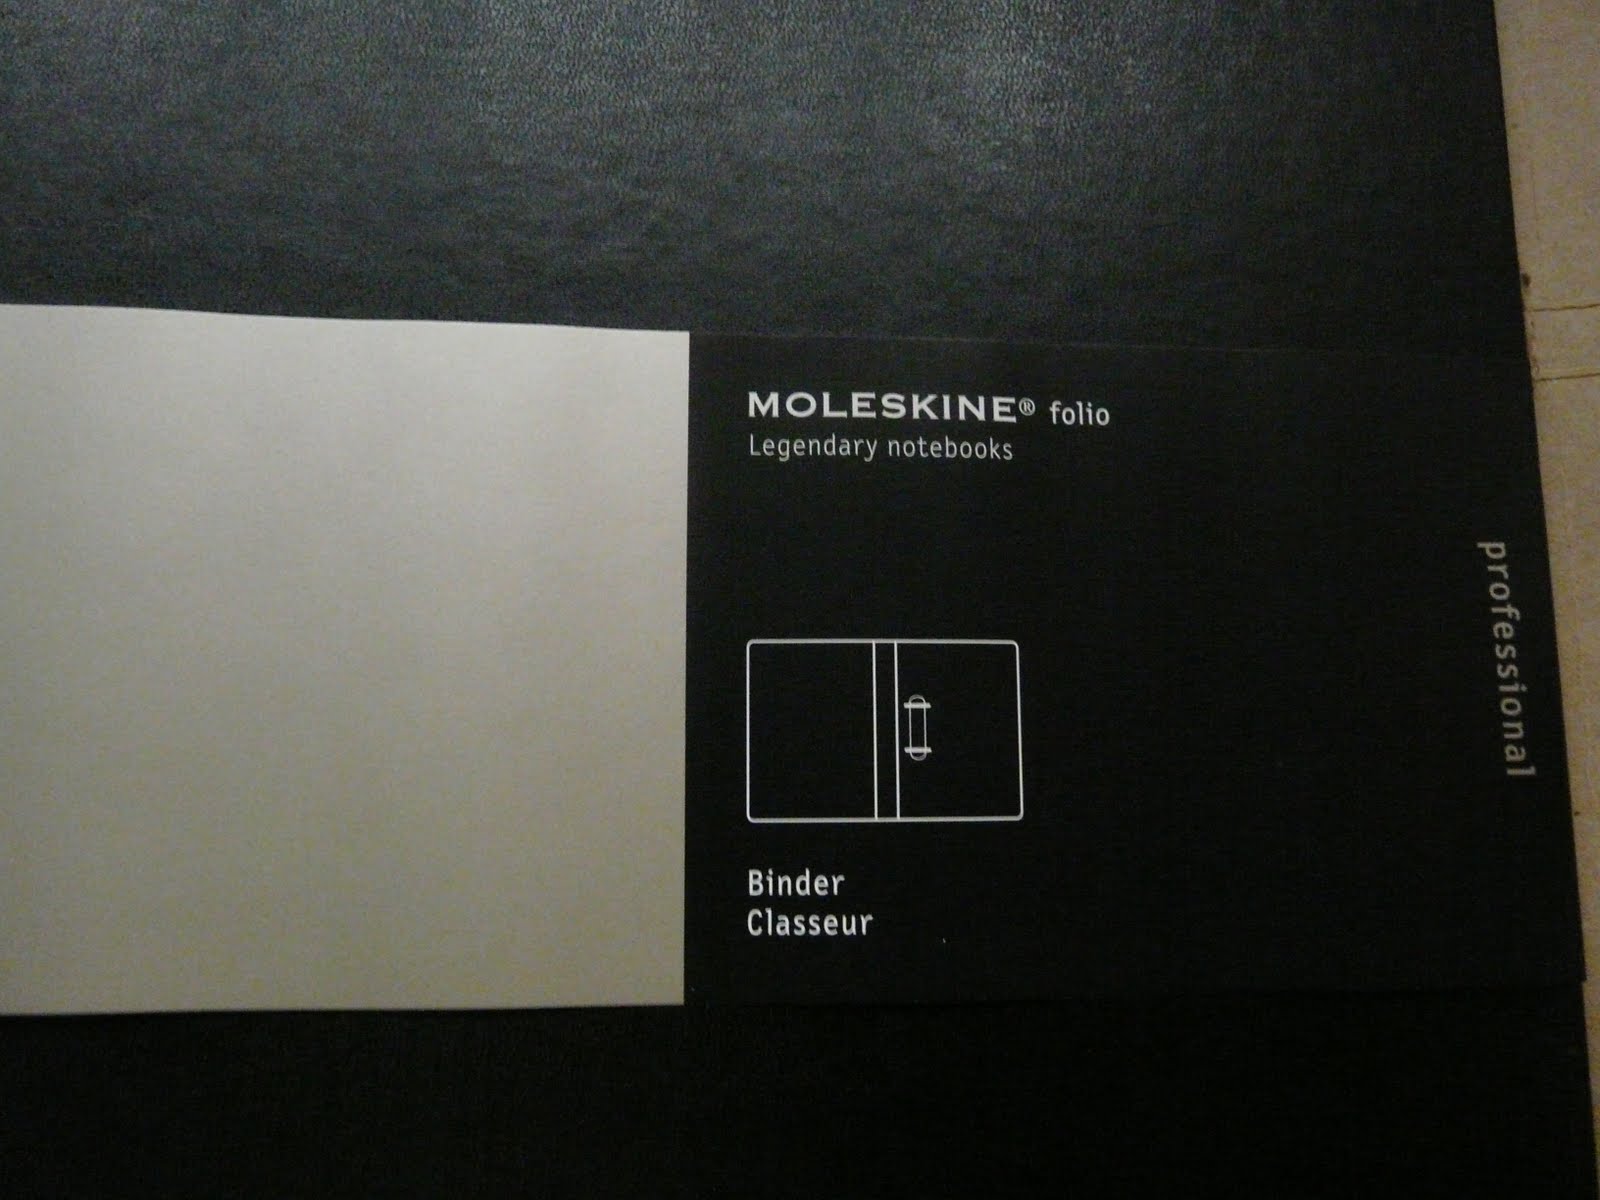 |
| The Front with the iconic paper band |
 |
| The Back of the iconic paper band |
 |
| The interior |
 |
| The left side of the interior |
 |
| The Front with the elastic band |
 |
| The Loss & Rewards Information (an iconic feature of Moleskine) |
 |
| Moleskine website address on the back of the Front Cover |
 |
| The Metal Ring |
 |
| The Inner Expandable Pocket |
 |
| Booklet of the history of Moleskine's legendary notebook |
 |
| Identification Number sticker that accompanies every Moleskine |
Moleskine's Folio collection also has an Organising Set to be used in conjunction with the Ringbinder. It consists of 6 dividers, 1 expandable pocket and 12 labels. Detailed photos as seen below:-


 |
| The 6 Dividers |
 |
| Expandable Pocket |
 |
| 12 White Labels |
 |
| The Side of the Expandable Pocket (made of cloth) |
As usual, this will include a booklet on the history of Moleskine's legendary notebooks and a notebook indentification number sticker.
Saturday, September 4, 2010
Dark Soya Sauce Fried Chicken Wing (Or Kwei Sit/黑鸡翅)

I came across this dish more than 20 years ago when my parents bought it from a mixed vegetables stall in a coffee shop near their home. It costs 50 cents a piece then. Sometimes, we will buy a packet of rice with vegetables and 2 pieces of this. Sometimes, my mother would just buy 10 pieces of this to add to the dishes she had cooked for our dinner. This dish has never failed to stimulate our appetite.
After I got married and have my own kids, I bought for them and they love it immediately. This is a dish which my maternal family call it "Or Kwei Sit" (in hokkien). Whenever we didn't cook and we bought mixed vegetable rice, we would be sure to include this delicious dish.
Unfortunately, about 5 or 6 years ago, the coffee shop was converted to a CK shop and the stall (and this dish) was no more to be found. And we had never seen this dish in any other mixed vegetables rice stalls. Fortunately, my dad loves this dish so much that he had tried to figure out the ingredients used to cook this dish and had asked my mom to try cooking it. After a few tries and failures, she came quite close to it. The only thing we still can't master is the crispiness of the chicken skin. However, the taste is still as good. My mom passed the recipe to me and I also tried it many times and only until now managed to scrape by. Though not exactly as the original, my kids and my husband still love to eat it.
Ingredients:-
1 kg frozen chicken wings (big ones with the 3 parts (thigh, middle wing and the tail) bought from the wet market, I find the ones from supermarket too small)
Plain flour
Corn flour
1 egg white (big egg) or 2 egg whites (small egg)
Salt
MSG (optional)
Ginger juice
Pepper
Cooking oil for deep frying
Garlic, minced
Dark Soya Sauce
Light Soya Sauce
Light Soya Sauce
Sugar
Water (about ⅓ rice bowl)
Method:-
1. Wash the chicken wings, rub them with salt, rinse and cut into 3 parts. Dry with paper towels.
2. Marinate them with salt, pepper, ginger juice, MSG (optional). I would normally marinate them overnight to make sure that the seasonings are absorbed well into the wings.
3. When ready to cook, add the egg white, corn flour and plain flour. Use your hands to mix and make sure all wings are well coated.
4. Heat up cooking oil (enough to cover the wings) and deep fry the wings until they are crispy.
5. Leave about 1 tablespoonful of cooking oil in a wok and stir fry the garlic till fragrant. Make sure they don't get burnt or they will be bitter. Cook them on low fire.
6. Add in the dark soya sauce, light soya sauce and sugar and stir fry a bit and then add in the water. When the water boil, add in the fried chicken wings and quickly stir fry to ensure that all the wings are well coated with the dark soya sauce mixture. When the liquid are dried up, dish up and serve.
My youngest son and I love to eat the tail because the skin will be crispy and fragrant. Hope you like this recipe.
Monday, August 30, 2010
Moleskine Passions Recipe Journal
Moleskine has published six Passions Journals: Wine, Book, Wellness, Film, Music and Recipe. I had bought the Passions Recipe Journal because I like to collect recipes on food that I love.
It sports a hard cover with cutlery images (front cover only) such as fork & spoon, whisk, knife, glove, scissors, cup, rolling pin, grater, spatula, pepper mill, tongs, etc. It has 240 pages (120 leaves) of acid-free paper (off-white) measuring 5 by 8.25 inches (13 x 21 cm) and weighs 13 oz (0.8 lbs or 381g). Includes 202 adhesive labels (40 to be used on the blank tabs, 150 coloured with icons and 12 to customize the cover). ISBN No: 9788862933155. Published on 10 Feb 2010.
A detailed peek inside reveals the followings:-
| Pages | Type | Usage |
|---|---|---|
| 2 - 3 | Planning | 1 section; used for planning |
| 4 - 7 | Food Calendar | 1 section; seasonal food calendars for the Northern & Southern Hemispheres |
| 8 - 12 | Food Facts | 1 section; useful charts showing amounts, calories, carbs, protein & fat |
| 13 | Useful Measures & Conversions | 1 section; useful measures and conversions |
| 16 - 121 | Recipe Review/Log Section | 6 tabbed sections; 16 pages per tab for recipes |
| 123 - 218 | Personal Tabbed Section | 6 tabbed sections; 16 pages for each personal tab |
| 219 - 234 | Blank Pages | 1 section; blank note pages |
| 235 - 239 | Index | 1 section; used to create index for your personalized book |
Followings are the detailed pictures of this Journal:-
 |
| Front Cover |
 |
| Back Cover |
 |
| Cover embossed with cutlery images |
 |
| A Booklet with Translation of Cooking Terms in English, Francais, Deutsch, Italiano, Japanese and Espanol |
 |
| Planning Page |
 |
| Food Calendar - Northern Hemisphere |
 |
| Food Facts Page |
 |
| Useful Measures and Conversions Page |
 |
| Tabbed Recipe Section |
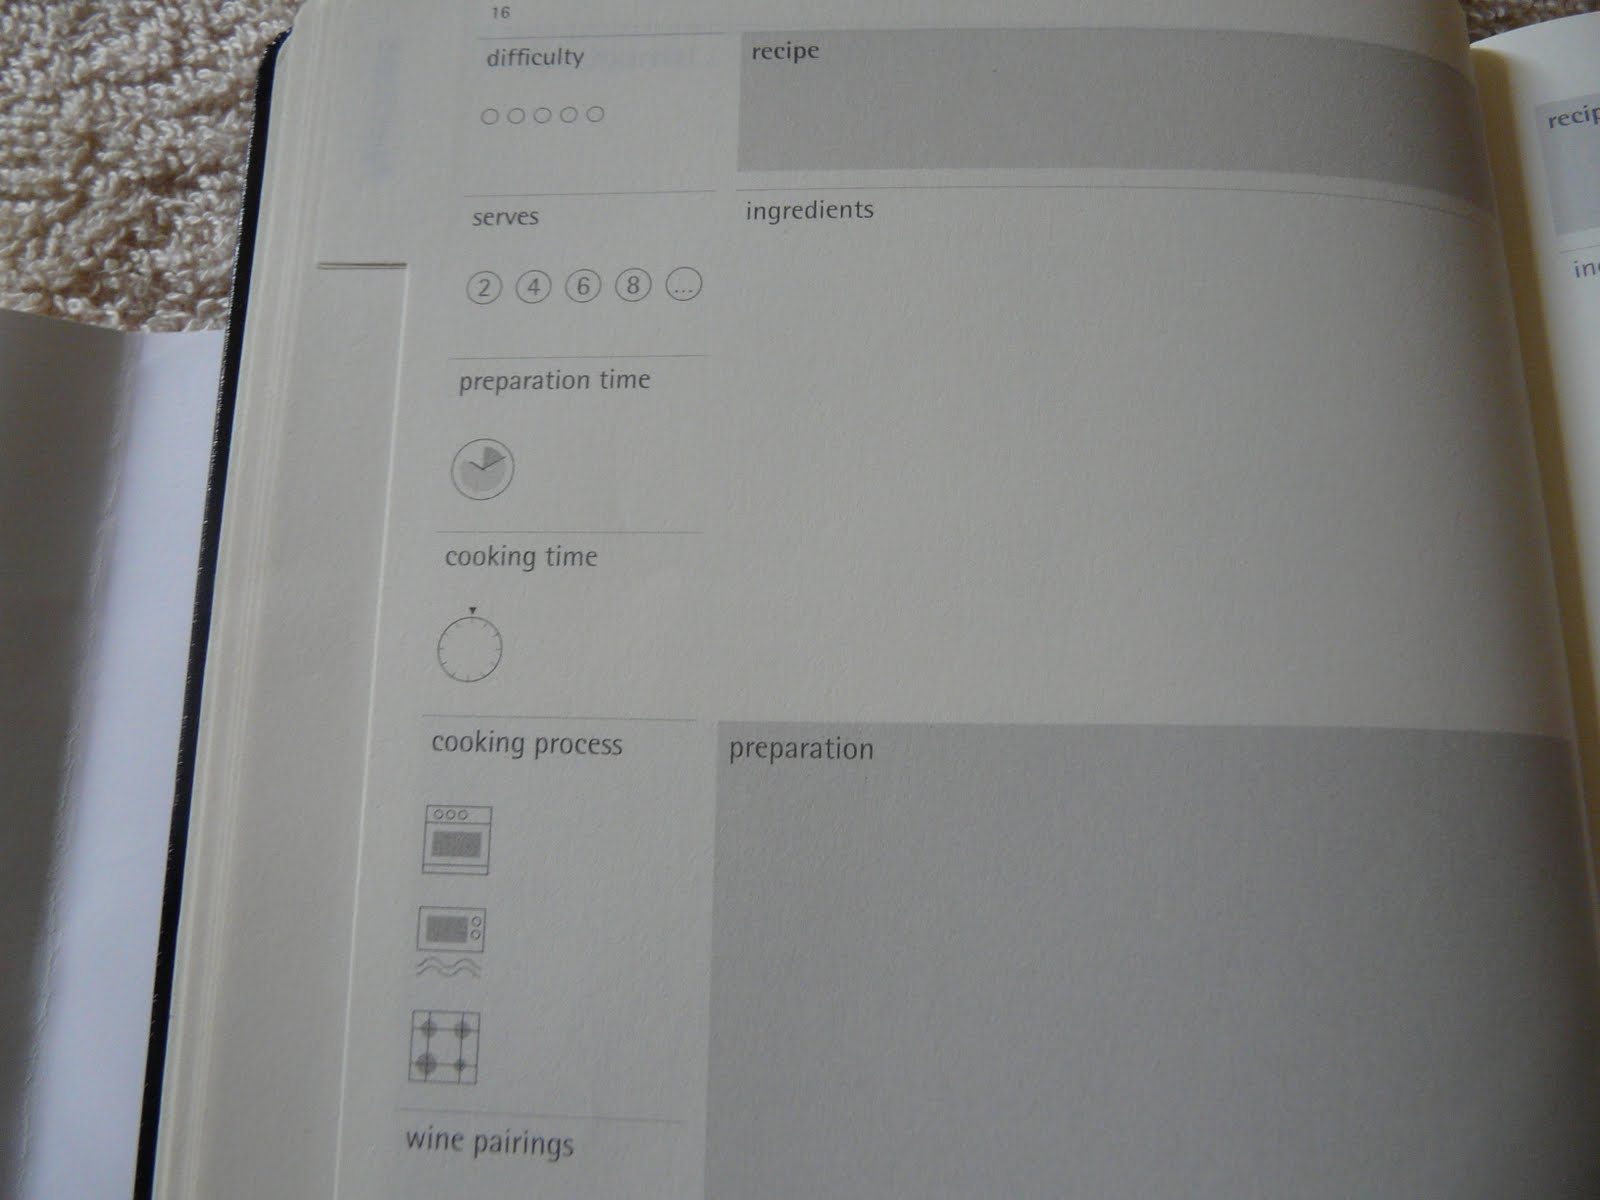 |
| Recipe Details Page |
 |
| Cocktails Recipe Page |
 |
| Personal Tabbed Section |
 |
| Blank Pages |
 |
| Index Page |
 |
| Expandable Pocket (2 Compartments) |
 |
| Stickers |
 |
| Stickers |
 |
| Stickers |
 |
| A Booklet of the History of Moleskine (Comes with every Moleskine Products) |
 |
| Notebook Identification Number |
Subscribe to:
Posts (Atom)